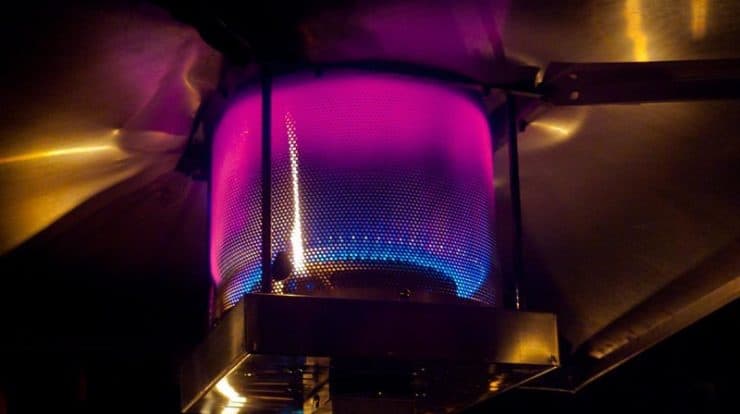
It is good that we can extend the summer feeling by using a patio heater to keep the warm going during the cold night in order to enjoy the outdoors on the deck for a little bit longer.
We can achieve this by using a good patio heater, however, sometimes the heater does not work well and we have to do some troubleshooting.
One of the most common causes of a patio heater breakdown is the failure of the thermocouple. The heater won’t light up if this component is faulty or clogged.
The thermocouple in a propane patio heater can easily be cleaned by removing it from the pilot assembly and use a sponge, steel wool or other abrasive material to scrub and dislodge any accumulated debris.
In all fairness, maintaining a gas patio heater may require some hard work and requires some know-how on the mechanics of the heating system in order to get the maximum efficiency and use out of the unit.
Learning how to clean a thermocouple on a patio heater is one of a few tasks necessary the keep the heater working efficiently for a long time.
What is a Thermocouple in a Patio Heater?

A thermocouple is a sensor or a thermoelectric device for measuring temperature. It is made up of two pieces of metal tubing that’s smaller than a soda straw.
This sensor consists of two dissimilar metal wires, joined at one end to form two junctions, and connected to a thermocouple thermometer.
The problem with the patio heater is that for a large part of the year it is in storage. As a result of it not being used for much of the year, dust, soot and other particles can clog the metal tubing and thereby affect the ability of the heater to light up.
This is a big problem because it probably won’t light up when you need it the most. If you want to keep warm on the cold outdoor deck it is a good idea to learn how to clean a thermocouple on a patio heater.
We can easily clean the propane patio heater by using a sponge, steel wool or some other abrasive material to get rid of accumulated debris in the thermocouple by removing it from the pilot assembly.
How to clean a thermocouple in easy steps.
Again this is one of the most common faults in why the patio heater stop working.
#1 Gather the required tools
The tools you need for this job is a sponge, soft cloth, steel wool, pencil eraser and a screwdriver. If you don’t have these tools at home you can consider purchasing them inexpensively on Amazon.
- Screwdriver – Klein Tools 32500 Multi-Bit Screwdriver is a great option.
- Steel wool – Red Devil 3332 Steel Wool Multi-Grade Pack.
- Pencil – Ticonderoga Presharpened No. 2 Pencils.
#2 Locate the Thermocouple
Before you do anything turn off the gas supply. Use your screwdriver to unscrew the thermocouple from the control box. Then remove the thermocouple from where it’s attached close to the pilot light.
#3 Check the Thermocouple for issues
Now that you have taken out the thermocouple, it is time to remove the build-up of soot. The build-up of soot inside the thermocouple makes it difficult for the patio heater to detect heat loss or heat build-up.
While you are at it, check to the see if there is any corrosion on the ends of the thermocouple which might prevent power from reaching the pilot light.
#4 Clean the Thermocouple
Sandpaper – Now its time to clean. Rub the ends of the thermocouple with a small piece of sandpaper to remove excess corrosion. Continue the rubbing process until there is no visible sign of corrosion on the ends of the thermocouple.
Then take a clean piece of a soft cloth and wipe away any remnants of corrosion left uncleaned by the sandpaper.
Steel Wool or abrasive sponge – use the abrasive side of a sponge or steel wool to rub and gently lift dirt, soot, and rust from the thermocouple without causing any physical damage to it.
You might be tempted to use cleaning chemicals but avoid using cleaning agents because they contain flammable chemicals. If these chemicals are not cleaned away properly they can result in an explosive event.
Note: While you are in the cleaning process look in the creases for a build-up of rust. You may notice them between the threads of the screws used to assemble the thermocouple.
The tightening screws can be hard to reach and to clean, therefore, it might be pragmatic to use the eraser of a pencil to clean away the dirt, dust and soot found on the thread of those tightening screws.
The thermocouple must be spotless when you are finished. So, remember to remove the remnants of the eraser with a clean piece of cloth.
#5 Reattach the Thermocouple
If you are satisfied with the cleanliness of the thermocouple it is time to reattach it to the pilot assembly system.
Use the same meticulous process as you did when you disassembled the thermocouple to reattach the pilot.
Check to see that everything works as planned by turning on the heater and see if the pilot light is on. Have problems? Follow the instructional manual provided by the manufacturer.
Here is a quick video that would shed some light on how to clean the patio heater that won’t light.
Never bypass the tilt switch on your patio heater.
A Quick Step by Step Guide On How To Clean The Thermocouple
Step 1: Disconnect the gas line from your heater by unscrewing the coupler that is attached to the gas inlet valve. The gas inlet valve at the bottom of the burner.
Step 2: Remove the top cover from your patio heater with your Philips screwdriver. Closely follow the instructions provided by the manufacturer.
Step 3: Locate the burner assembly and rub the burner assembly with the steel wool or sandpaper to dislodge the dirt, debris and soot away.
Step 4: Locate the small silver venturi tubes at the back of the assembly and clean it of any debris. Anywhere else where you see the build-up of debris just give it a clean.
Step 5: Reassemble the patio heater cover just by reversing the removing steps.
Step 6: Reconnect that gas coupler to the inlet valve.
Step 7: Turn on the patio heater to test the pilot light and if it is cold outside, enjoy the heat.
Additional Safety tips
Use goggles to prevent dust or rust from flying into your eyes.
Make sure that the gas line is turned off and kept away from a heat source
Note: If cleaning out the thermocouple and the pilot does not work the problem may be with your tilt switch. The second may common problem as to why your patio heater does not work is faulty tilt switch. It cant be fixed therefore you have to replace it.
Conclusion
The patio heater can sometimes stop working properly because of clogged pilot tubes.
Being able to clean the thermocouple of your patio heater will save you both time and money.
We all can have a go at fixing or maintaining our patio heaters. If you are not confident enough to fix your own heater get help from a professional.
If you want your heater to last a long time then you have to maintain it regularly.